IVR Settings
Enter data for your new IVR configuration or modify settings in existing setups.
When you create an IVR in CommPeak Dialer, configure its settings first. To modify an existing IVR, click Edit under Actions on the Inbound Configurations page, then navigate to the IVR Settings tab.
Inbound Configuration Settings
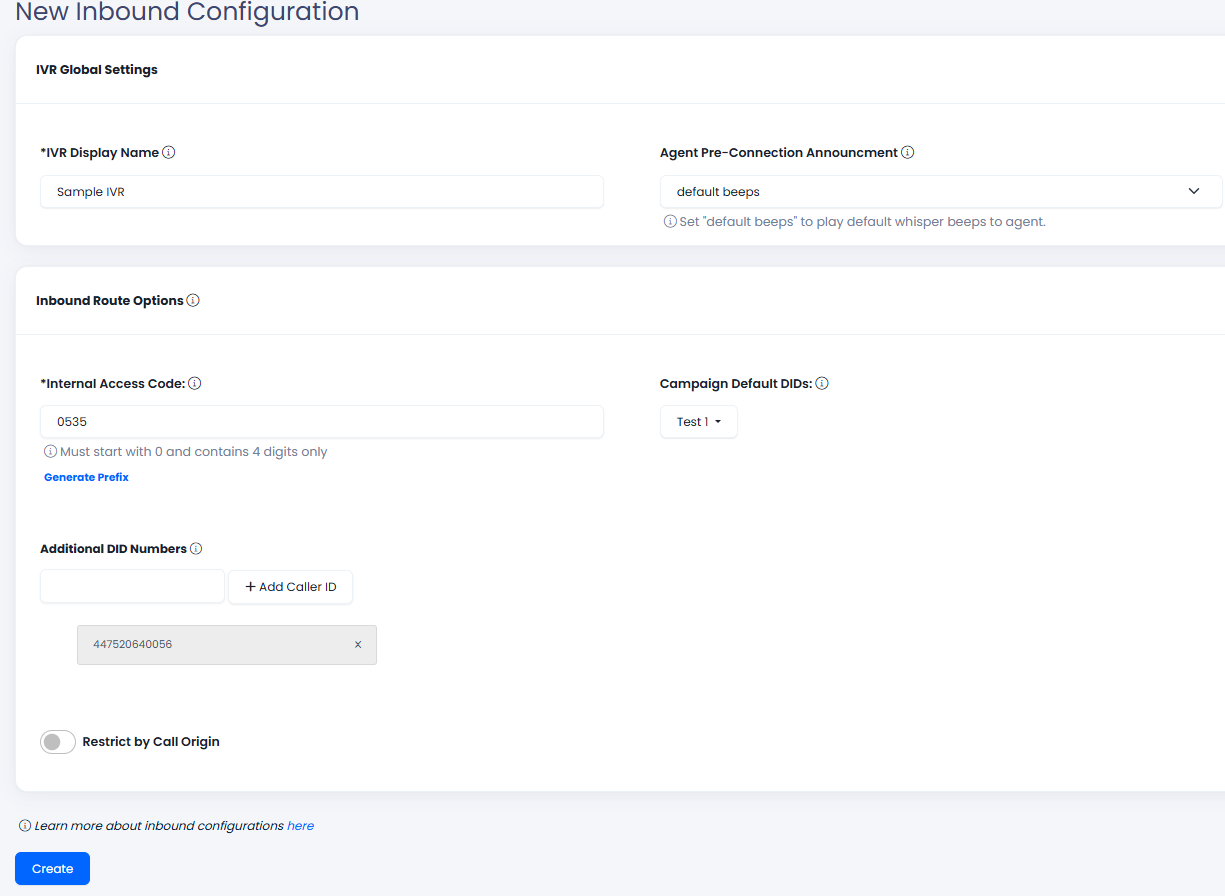
All fields are mandatory in IVR Global Settings:
- IVR Display Name: Specify your IVR's name to identify it within your system easily.
- Agent Pre-Connection Announcement: Leave a default option or select a custom playback file from the drop-down list. This audio will be played to the agent before connecting the caller. Learn how you can upload a custom file or generate your recording.
Define Additional Route Options as follows. These settings determine how inbound calls are redirected to the IVR.
- Internal Access Code: Enter a unique 4-digit prefix that starts with 0 or click Generate Prefix. Dialing a number with this prefix will connect the caller to the IVR.
NOTE
You also need to connect DIDs to your routing prefix.
- Campaign Default DIDs: Select a campaign from the drop-down list. All calls to the Caller ID from this campaign will route the caller to the IVR.
- Additional DID Numbers: Beneficial for managing numerous numbers across different regions or services.
- Restrict by Call Origin: Activate this setting to permit only calls from a designated origin, like a domain or IP address, to access this IVR flow. This filter guarantees that a call will be blocked, even if it matches a legitimate DID or Internal Access Code, unless it comes from the designated provider. Helpful for implementing tighter security measures for call routing and blocking impersonated or illegitimate traffic
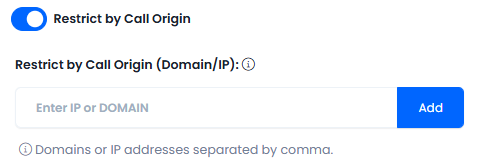
Restrict by Call Origin
After you click Create, the system will navigate you to the IVR Flow tab, where you can build your flow.
Connecting DIDs to the Routing Prefix
To properly route incoming calls, follow these steps to connect the DIDs through the CommPeak using the generated routing prefix:
-
At CommPeak Portal, go to DIDs > Configure.
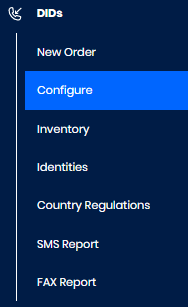
DIDs>Configure tab in the portal main menu
-
Navigate to the DID Voice URI tab and click Create DID Voice URI.

DID Voice URIs > Create DID Voice URI option
-
Enter a name and SIP URI using the hints:
-
Name: DID voice URI alias (e.g., Dialer)
-
SIP URI consists of the following parts:
-
routing prefix+{e164} (e.g., 0535{e164}@sample.pbx.commpeak.com:5080) or inbound number (e.g., [email protected]:5080).
-
domain: your PBX server domain with 5080 port (e.g., @sample.pbx.commpeak.com:5080).
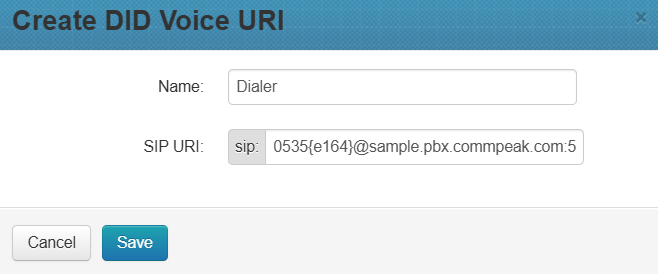
Creating a DID voice URI
-
-
Click Save.
This URI will serve as the destination for incoming calls, directing them to the Dialer IVR. -
Assign the relevant DIDs. Under the newly created URI, add the DIDs that should be routed through it.
To add a DID number, click DIDs and then proceed.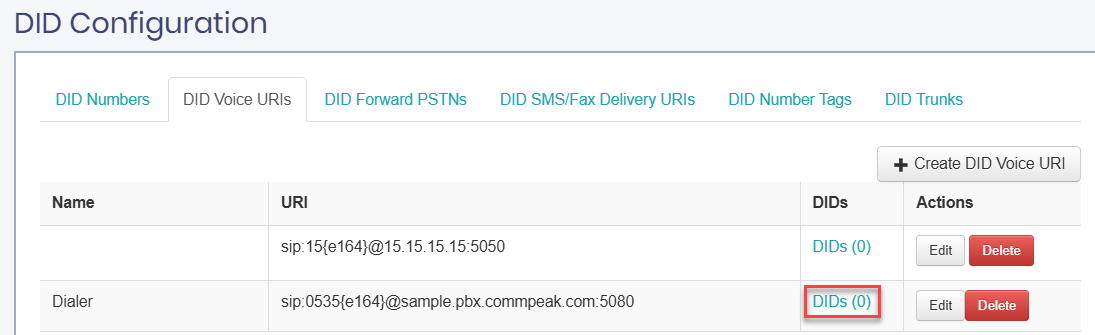
DIDs button
This ensures that Dialer will handle calls to those DIDs correctly.
Updated about 1 month ago